Friday, December 14, 2012

'Tis the Season!


You want to know one of my most favorite things about the Christmas season?!
 
The holiday cards!!


 We did not do holiday cards this year because of a few reasons:
 
#1) I've been a little distracted the last few weeks and I couldn't get my act together
#2) We can't compete with the my extended family and their ADORABLE babies and kids
#3) I tried and failed miserably getting the kittens to sit still close enough together to snap their pic ;)
#4) Joey refuses to be married to the crazy cat lady who spends an hour trying to get two kittens to sit together for a photo...
 
I can not wait to send out our first family Christmas card next year, and I am gathering inspiration already. Here are a few that I have seen online:

Love the cut off shot of the parents in this pic, and who can resist a little holiday bunting...

Five Creative Photography Ideas for Family Christmas Cards – Toddlers
source


Twinkle lights and baby chub...can't beat it!

{ great for christmas cards } by alisa
 
  
If I could get my kittens do to this I would be a magician!


dogsinlights 235x300 Ideas For Cute & Clever Christmas Card Photos
source


What did you do for your card this year??
XOXO Katie
Best Blogger Tips Pin It

Wednesday, December 12, 2012

Two Tone Tammy

I can't tell you how excited I am to be able to start sharing my nursery projects with you. I have been holding off doing anything until I reached 14weeks, just in case I jinxed it. But I am officially 18 weeks now and the projects have begun! I told you all about the vibe I was going for last week in this post. Neutral is the name of the game :)
 
Here is the checklist that I have started (and I am sure will evolve as I go) with what I want to do to get the room ready:
 
-design and sew bed skirt and bumper (bumper we will use when baby is a little older)
 
-makeover vintage dresser for changing table
 
-buy a crib
 
-rehang and accessorize chalkboard
 
-rewire standing lamp
 
-dress up back of bookcases
 
-reorganize closet
 
-figure out storage (toys, laundry, books)
 
-art for over the crib
 
-make pillows for bed
 
-find a home for old office space
 
All for as close to $500 as possible
 
 
The first project I tackled was the dresser makeover. And you all know how I love a good furniture face lift! Of course, I went straight to Craigslist to find something that was going to work. I wanted a dresser that was tall so changing baby would not kill my back, had good storage, and was not a true changing table. I would love this to be something that baby can use for a while.
 
I found this for a whopping $85.


Honestly, I really did like the original color, but it was not quite the right blue and it needed a little love.
 
First step was to remove the hardware, then sand and use a filler to fix any dents or chipped areas.


Up next was primer (2 coats).


I was debating going all blue like the one on my inspiration board, but then I realized the the pale blue kind of blended in to the light gray walls. Blah...
 
So I decided to go two-tone with it. A white body and pale blue drawers. I knew I liked the two-tone look from this side table project I did, and if it went south then it would just take a can of paint to fix. I already had the blue and the white semi-gloss paint from past projects as well as a foam roller. Whoop Whoop for having to buy NO supplies!
 
After two coats of each color, I accented the detailing that frames the doors with a thin pinpoint of white paint. I just used painters tape to make sure that it was not messy.


I loved the hardware so I was able to just reattach and the dresser was good to go!


I think baby will love it. If not, I will tell it how my back was sore for a week after painting this sucker, so that's just too bad!
 
All in all, I am in this project for $85. Not too shabby...


XOXO Katie

Best Blogger Tips Pin It

Monday, December 10, 2012

Salty'n'Sweet

I love baking cookies, but there is only ONE cookie that Joey actually requests in particular. I don't know what that says about my baking skills, but I'll give him the benefit of the doubt. I just tell myself that he loves ALL my cookies, these ones just must be extra special :)
 
 
Of course, I found this recipe on Pinterst so I will not pretend like its my own genius that came up with this salty'n'sweet combination. It was all Sarah over at her blog Sugar Cooking. It pretty much a delicious chocolate chip cookie with broken pretzels in it and then sea salt on top. I know you mouth is watering right?!
 
 
The only substitution I made was I didn't use the peanut butter chips that were in Sarah's recipe, instead I used half milk chocolate and half semi-sweet chocolate chips. Oh, and I doubled the recipe- obvs.


Here are the directions from Sarah's Blog:
 
 
Recipe: Chocolate & Peanut Butter Chip Pretzel Cookies


Makes 24 cookies
 

Ingredients:
1 1/2 cups of all purpose flour
1/2 tsp. of salt
1/4 tsp. of baking soda
1/2 cup of butter at room temperature
1/2 cup of tightly packed light brown sugar
1/3 cup of granulated sugar
1 egg (beaten)
1 tsp vanilla extract
 
1 cup milk chocolate chips
1/2 cup peanut butter chips
1/2 cup broken up pretzel pieces
Pretzel Salt or Sea Salt


Directions:
In a medium bowl, sift together the flour, baking soda, and salt. Set aside.
 
In a larger bowl, beat the butter and sugars together on medium speed until light and fluffy (about 2-3 minutes). On low speed, slowly add the beaten egg and vanilla extract.
Beat to combine, scrape down the sides of the bowl.
 
Add the flour mixture and beat just until there are no more streaks of flour. Stir in the chocolate chips, peanut butter chips, and pretzels. Cover and refrigerate for an hour.
 
Preheat the oven to 350F. Line baking sheets with parchment paper. Scoop out well rounded tablespoonfuls of the dough and sprinkle with pretzel salt. Leave about 2 inches between each ball. Bake for 10 minutes. If you prefer crispier cookies increase the baking time by 1-2 minutes. Allow the cookies to cool on the baking sheet for a few minutes before removing.


I'm not joking- these cookies are SOOOO good. They have just that little hint of salt that makes a tall glass of milk that much better.


I told Joey that I was going to take some to work and he actually got mad. As if 48 cookies was not enough to hold him over until at least next weekend :)


XOXO Katie
Best Blogger Tips Pin It

Friday, December 7, 2012

Neimies

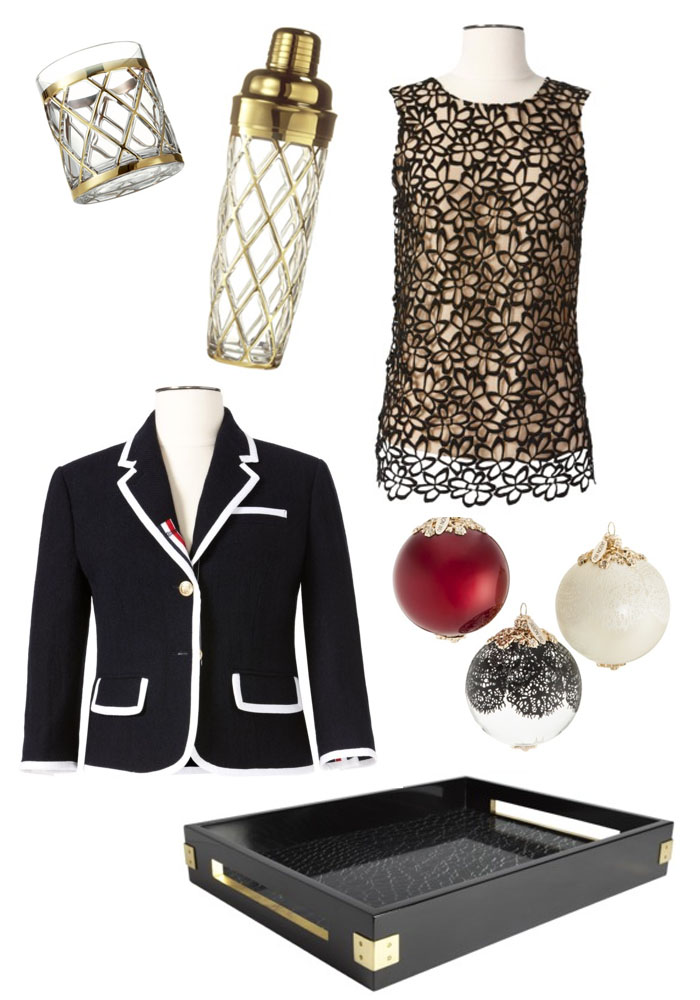
Loving the new Neiman Marcus collection for Target that just came out today. Maybe now I can feel like I am shopping in the "fancy" stores without breaking a sweat (or the bank). There were a lot of great hostess gifts and outfits in this collection so I am definitely going to check it out this weekend. Hopefully it has hit the shelves here in Boston!


 Have a great weekend everyone!
 
XOXO Katie
Best Blogger Tips Pin It

Wednesday, December 5, 2012

Going Neutral


A big "thank you!" to everyone that sent their kind words when I dropped the news about the baby on the way. We are so excited and I can't wait to share all of the fun things that this new chapter will bring!


We have decided that we are not going to find out the gender of our little nugget before his or her arrival. For the control freak planner in me this is going to be a little tricky, but I never walk away from a challenge :) Alas, people have done it for millions of years, and I don't think my baby will be any less bombarded with colorful and (probably) unnecessary accessories than the next on the block.
 
Honestly, I didn't really have to think twice about not finding out the sex of the baby. I just remember listening to the story of when I was born and how exciting it was for my parents when the doctor called out, "Its a girl!". My parents had been convinced I was a boy as they already had my brother and there had been a long string of boy cousins all born in a row. So when they realized that a tidal wave of pink and sparkles had just entered their life they were shocked and excited (or so they say...). I just want that same feeling when our own baby arrives!
 
 
Here are the challenges that I am going to be working with in the soon-to-be baby's room:
 
 
#1. It has to be a fully functional guest room as well as baby's room. My mom and sis are going to come and stay once the baby comes and I want it to be totally comfortable for them. Not like they are sleeping in a Toys-R-Us.
 
#2. We are on a VERY tight budget and I am determined to do this room for as close to $500 as I can get.
 
#3. Storage is a huge issue. Our closet in the guest room is already 3/4 full and we have no additional storage in our apartment or building. When it comes to "baby gear" we are going bare bone style. Like, "does a baby really need a crib?" bare bones style...
 
#4.  Since we won't know the gender, the color pallet needs to appeal to both a boy or girl. It can be somewhat adapted later, but I would like all the main components to be in place before I'm working on 2 hours of sleep a night.
 
#5. I already have some of the components of the room in place because it was already a functioning guest room (light gray walls, rug, chair, drapes, comforter, bookcases) so whatever I do needs to be in line with those elements. I really don't want to buy anything new if we already have something that is in good shape.
 
 
Below is the inspiration board that I am going to be working from. I am sure some things will change but so far I am loving the look!


The color pallet will be tan, cream, white, and pale blue. I will add in pops of pink if the nugget ends up being a girl, but I think that baby will be happy with the room no matter what!


XOXO Katie
Best Blogger Tips Pin It

Monday, December 3, 2012

Dressing Up For December

I will be the first to admit that I am not a huge holiday decorator. I find the clutter that seasonal decorating brings to be unbearable (at least while we live in this apartment). I am sure when I have a basement, attic, or at least a free closet that I will feel differently. But for now I keep the holiday decor VERY limited.
 
Now this poses a problem for my husband. He grew up in a house hold that would be decked out to the nines for every holiday, and Christmas was the holy grail of twinkle lights and stockings galore. Literally, his mom should win an award for decorating every surface of an 7 bedroom house before the first snowflake hit the ground.
 
Just to be a good wife ,I make sure that I do a little decorating so that I wont get nicknamed "the Grinch" during the holiday season.
 
There is one other small issue that we have in this household. One live tree + two crazy agile cats + breakable ornaments = disaster. Two years ago when we brought them home from the animal shelter on New Years day they bolted STRAIGHT for the tree. Literally climbing up it and knocking things off before I even had time to put the crate away.


So this year we went a slightly different route and didn't spring for the tree, instead we went for the Christmas ball! Ok...its a little sad and Joey looked like Tiny Tim walking out of the lot with a ball rather than a tree strapped to the car roof. But since I (and crossing my fingers that Joey will be with me if the residency stars align) will be traveling home to Chicago for the actual holidays, so I didn't see the need to have a big tree to put gifts under. I know...I know... Grinch, Grinch, Grinch. But this Grinch also hates vacuuming dry tree needles in July.


How do you like to decorate for the holidays? Are you a clutter-phobe like me?
 
 
XOXO Katie
Best Blogger Tips Pin It